dimanche 28 mars 2021

Pure Beauté


Il vous reste encore quelques jours afin de participer au défi du mois des Créations Edith Cloutier ! Un beau sketch qui m'a inspiré la page suivante.


Pour la réaliser j'ai utilisé les découpes de Fleurs Magnolia que j'adore, ainsi que les découpes de mots cartonnés Ici et maintenant et les phrases autocollantes Passe-Partout 6.
Nous avons bien hâte de voir vos créations !!!


Image hébergée par servimg.com

lundi 15 mars 2021

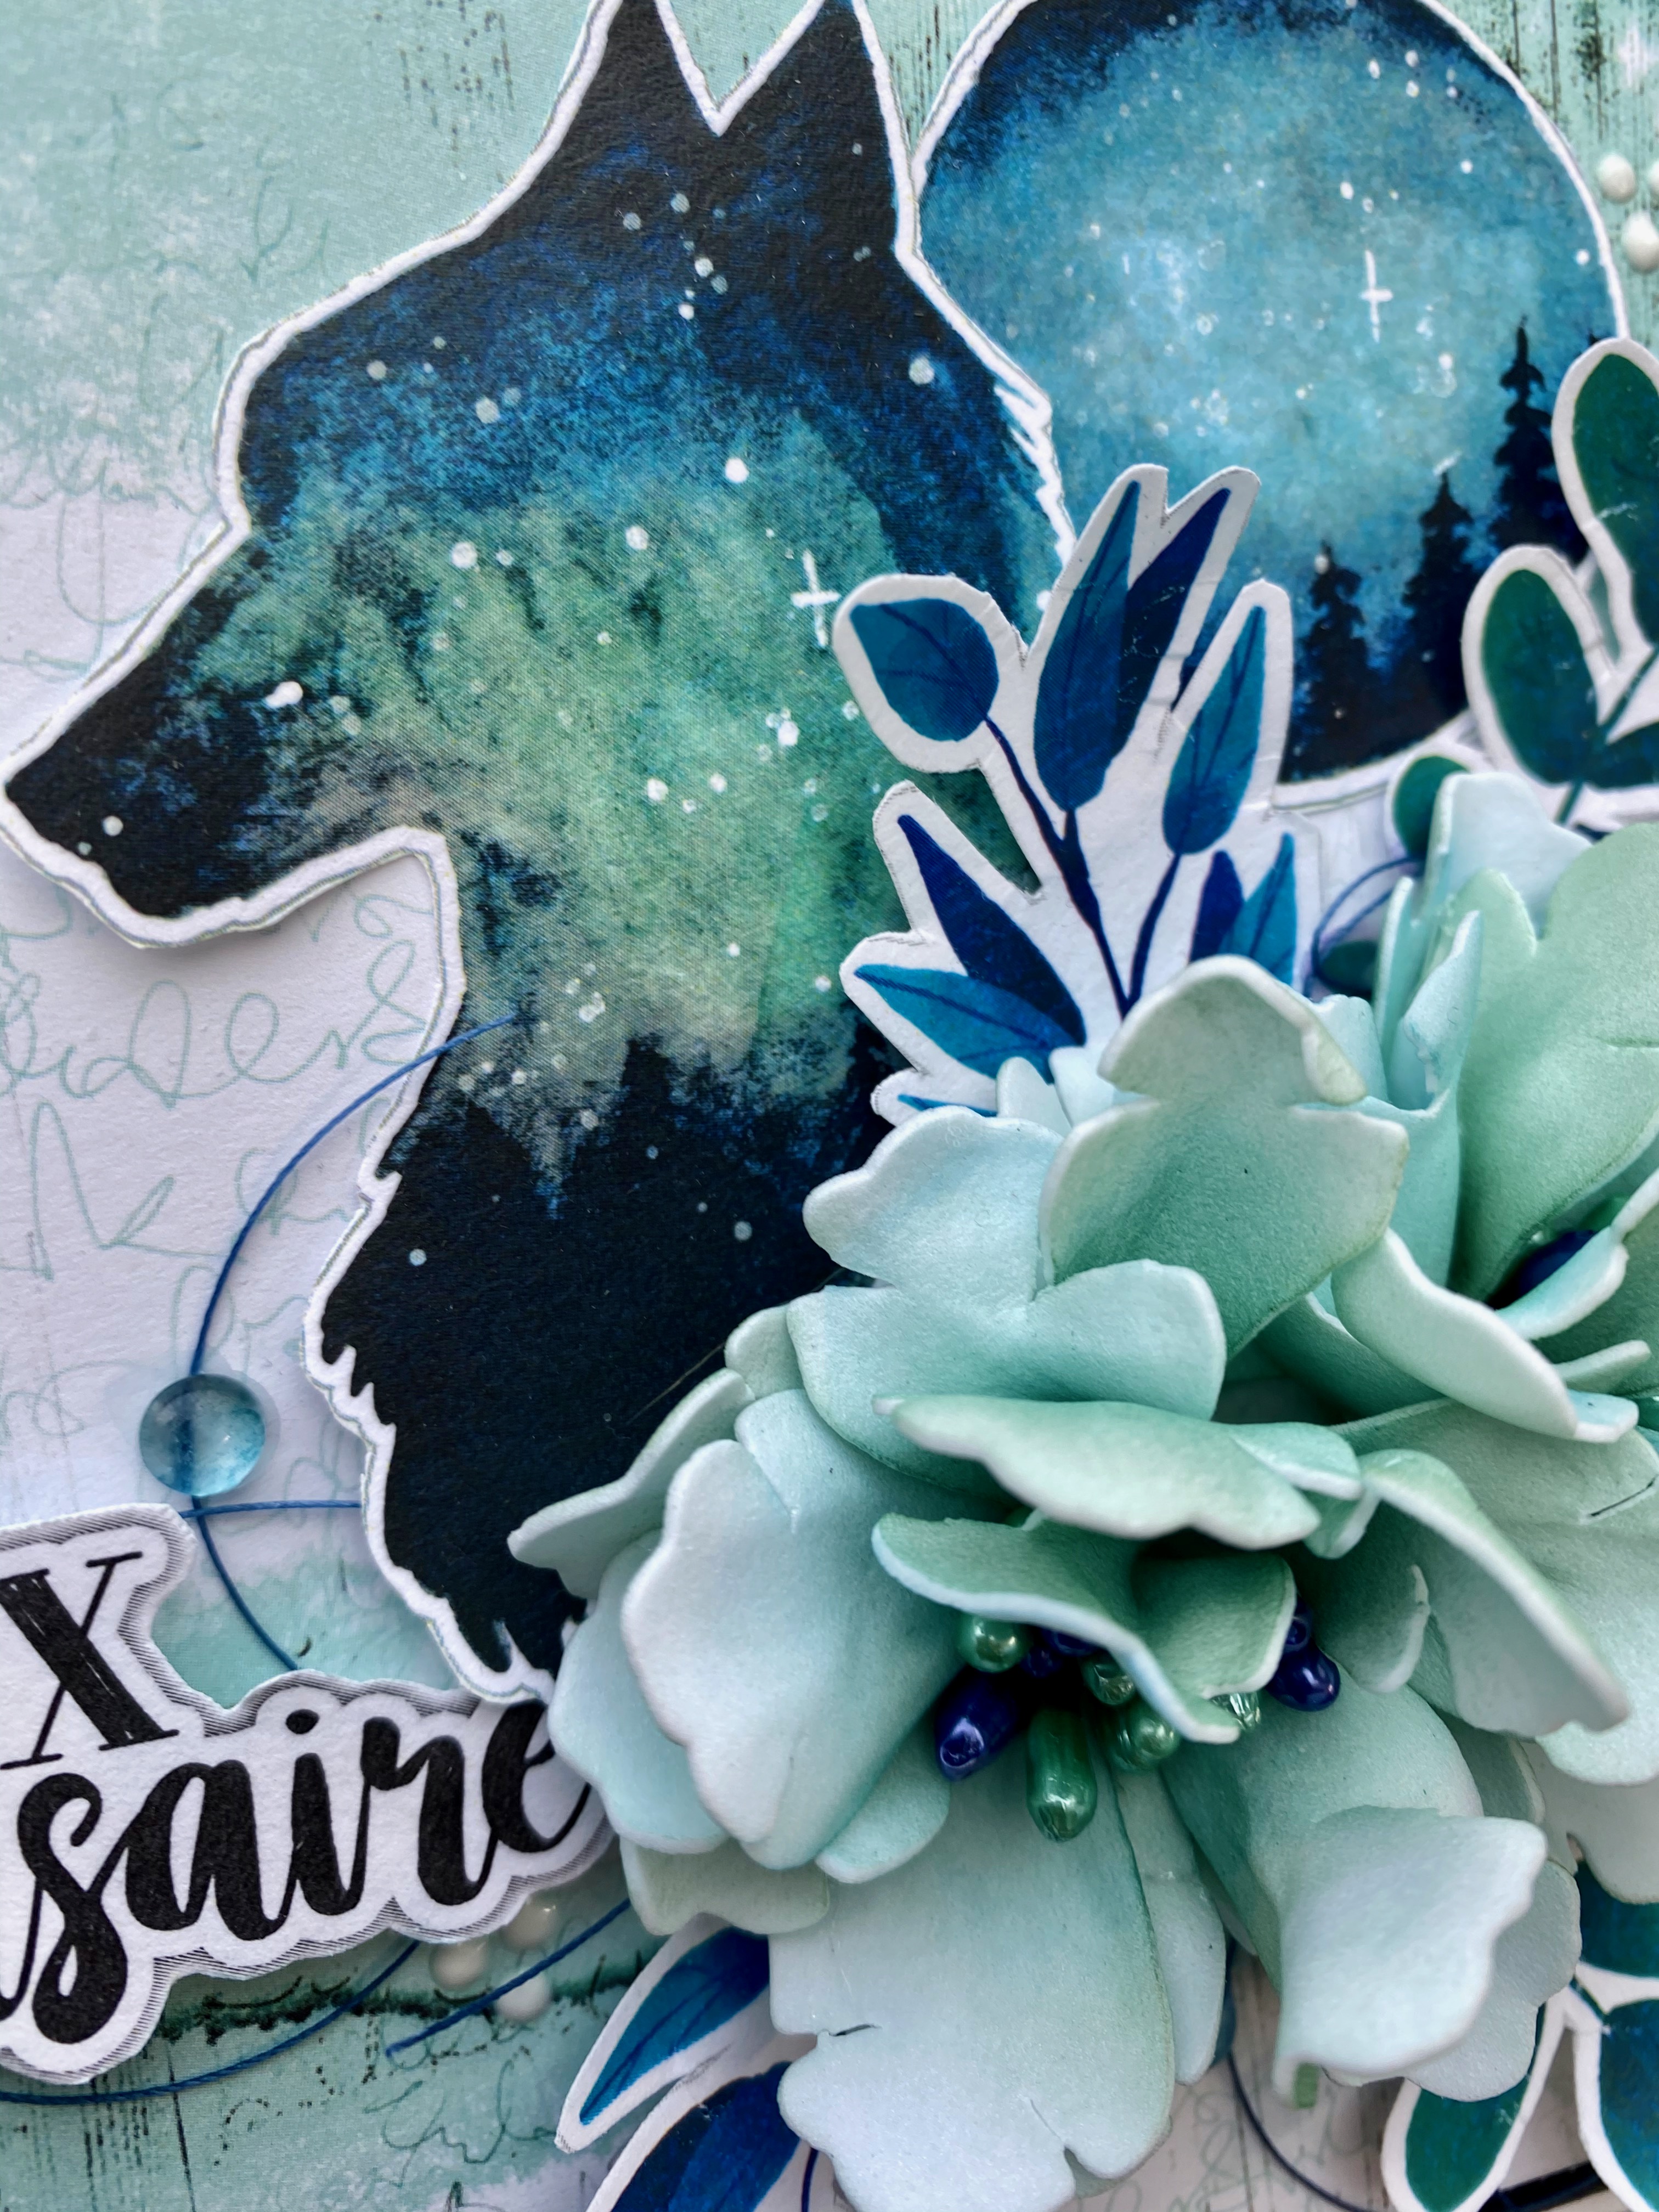
Coeur de loup !!!!!


Si vous êtes comme moi, lorsque vous faites une carte, vous restez toujours avec du matériel en trop. C'est pourquoi au final je fais pratiquement toujours deux cartes: ma carte principale et une autre (souvent plus petite) sur laquelle j'utilise tout ce qu'il me reste (découpes faites en trop, fleurs faites en trop, retailles de papier, etc). Comme cela, je fais d'une pierre deux coups !
Pour faire ces deux cartes j'ai utilisé les planches de découpes Boréales et feuillages 4 ainsi que les mots cartonnés Anniversaire de la compagnie Les Créations Edith Cloutier.

Mes fleurs en papier foam sont faites à la main avec les produits de Heartfelt Creations.


Image hébergée par servimg.com

mercredi 3 mars 2021

Une urne remplie de fleurs

Aujourd'hui je vous propose une carte panneaux avec comme fleur le Sweet Peonie, dans une couleur que j'aime beaucoup, soit Light House de Archival ink.  L'Urne  de la collection Shoppe Floral est tout appropriée ici pour faire un magnifique bouquet de fleurs !


Products Used:
Large Floral Urn Die, HCD1-7329
Floral Shoppe Accents Die, HCD1-7330
Floral Shoppe Fillers Die, HCD1-7331
Large Floral Urn Cling Stamp Set, HCPC-3931
Floral Shoppe Accents Cling Stamp Set, HCPC-3932
Floral Shoppe Fillers Cling Stamp Set, HCPC-3933
Floral Shoppe Paper Collection, HCDP1-2122
Scalloped Flourish Gateway Die, HCD2-7325
Ornate Flourish Gateway Die, HCD2-7326
5" x 7" Gateway Fold Card - White, HCCB1-495
Small Sweet Peony Die, HCD1-7173
Small Sweet Peony Cling Stamp Set, HCPC-3819
Large Sweet Peony Die, HCD1-7174
Large Sweet Peony Cling Stamp Set, HCPC-3820
Rock Candy Stamens-Small, HCS1-459-4
Celebrate Love Sentiments Cling Stamp Set, HCPC-3847
Deluxe Flower Shaping Paper Pack of 50 - White, HCPP1-475
Deluxe Flower Shaping Kit, HCST1-401


Other Products: Die cutting machine Cut’n’boss, heatgun, water mister, hot glue gun, hot glue, scissors, 

Instructions: The finished card measures 5 x 7” , including the flowers. Stamp Urn on cardstock paper using Pebble beach ink. Die cut and color with a daubers and the same color.

Than stamp various elements from the Floral Shoppe Collection in oilve green ink and cut with the appropriate die. Color with seaferer, sunflower, and light house ink. You can also use yellow zig marker. Make lots of them to be able to fill the urn just like you want.

Make flowers from the Sweet Peony collection. Stamp your flowers with light house ink onto deluxe flower shaping paper and color the flower with the same color. Diecut with the coordinate die. Spritz with water and give further shape with Deluxe flower shaping kit tools. Make a hole in the center and add stamens in the center. Use 3 layers to make one flower. (I made 3 large red flowers plus 3 small ones). 

For the base of your card choose a 5 x 7" Gateway Fold Card – White. With the Scalloped Flourish Gateway die, cut 3 pieces of paper with the biggest die from the sheet #6A ink the edge of all the paper with the olive green ink and a dauber. Glue it on the card base. On the front, glue a die from the paper #10B made with the ornate flourish gateway die.

On the front of the card, glue the Urn with 3D foam to give dimension. With a hot glue gun start gluing your flowers on the top of the Urn. Then fill the Urn with all the elements you already diecut from the Floral Shoppe Collection. To make you bouquet, simply use the “use-error” method, and when you like it, simply glue it. Stamp a sentiment on paper and add it to the right of the urn. 


lundi 1 mars 2021

Carte Happy Birthday


Aujourd'hui je vous présente une carte d'anniversaire faite avec mes fleurs préférés, les Wild Roses .  Je les adore !!!!


Image hébergée par servimg.com


Other Products: Die cutting machine Cut’n’boss, heat gun, water mister, hot glue gun, hot glue, scissors, cheesecloth, sewing thread, ribbon, funnel tray

Instructions: The finished card measure 5 x 7". For the base of your card choose a 5 x 7" Gateway Fold Card – White. With the Teardrop Lattice Gateway, diecut 2 pieces of paper #6B with the biggest die and one from the paper #1B. Ink the edge of all the paper with the French ultramarine ink and a dauber. Glue on the card base. Cut a gateway from the Teardrop Lattice Gateway Die in the sheet #11B. Ink the edge with blue ink and glue on the front of the card. From the Lattice Flourish Gateway Die, die cut the Sentiment ‘Happy Birthday’ on white cardstock 6 times. Glue on each other. Ink in blue and in yellow and glue on the front of the card.

From the Eyelet Frame Gateway Die, cut 2 borders from 11B sheet (one larger than the other). Ink the edge in blue and glue on the 2 last panels. Die cut a piece from the Lattice Flourish Gateway Die from the same 11B sheet. Glue only the base and the edge on the last panel to make a little pocket to receive money or gift card you want to give as a gift.

Make flowers from the Wild Rose Collection. Stamp your flowers with French ultramarine ink onto white flower shaping paper, color the centre with yellow ink and shade the rest of the flower using ultramarine. Color the reverse of the flowers and diecut with the coordinate die. Place facedown into the flower shaping mold, spritz with water and run through the diecutting machine to shape. When dry, give further shape with Deluxe flower shaping kit tools. Put glue in the center of the flowers and add rock candy stamens and rose hip stamen dipped in the crystal powder. (I used 3 larges petals to make a flower.) I also do three smaller flowers.

Make tiny flowers in red and navy blue by using the French Cottage Collection and white stamens. Also do leaves from the Floral Shoppe collection and use the fern green ink. Glue your flowers on the front of the card and add leaves to fill the empty space. (Add cheesecloth and sewing thread under your flowers.)

To add the finishing touch, add tiny flowers on the last page of the card.


dimanche 28 février 2021

Carte: Avec tout mon amour !


Les Créations Edith Cloutier nous permettent toujours de fabriquer de magnifiques cartes avec des produits toujours exceptionnels. Aujourd'hui j'ai créée une carte aux couleurs un peu plus masculine dans les tons de bleu.

Les découpes de la planches Fleurs d'hiver sont parfaites pour cela. Le tout agrémenté des découpes provenant des planches Feuillages 3 et Valentine.Image hébergée par servimg.com


dimanche 14 février 2021

Bonne St-Valentin !!!


Aujourd'hui, en ce beau jour de la St-Valentin, je vous présente mon interprétation du tableau d'inspiration du mois de février des Créations Edith Cloutier.


 Je me suis inspiré du cercle avec un titre au centre, des coeurs ainsi que des fleurs roses. En cette journée de l'amour, je vous souhaite beaucoup d'amour de soi et des autres, de bien-être, de bienveillance, et d'espoir ! Nous en avons tout bien besoin !!! J'ai utilisé comme produit: Découpes-Mots Cartonnés: Valentine et St-Valentin, Découpes Feuillages 2 et Doux printemps. 


Bonne St-Valentin à tous !!!


Image hébergée par servimg.com

samedi 13 février 2021

Utilisez vos dies pour faire des stencils !


Create your own stencil using dies and make stunning backgrounds! 


Êtes-vous une artiste qui aime utiliser même vos «déchets» d'artisanat? Transformez vos morceaux de carte que vous avez utilisés pour la découpe en pochoirs et créez des arrière-plans incroyables pour vos projets!

Parfait pour ajouter de la dimension à une carte plate pour l'envoi! Rejoignez-nous et suivez les étapes pour créer une superbe carte de printemps que vos amis et votre famille adoreront!


Hey Friend!

Are you a crafter that loves to use even your "waste" from crafting? Turn your pieces of card you have used for diecutting into stencils and create amazing backgrounds for your projects! 

Perfect for adding dimention to a card that's flat for mailing! Join us and follow the steps to create a stunning spring card your friends and family will love!


Bricolons !

Let's get crafting!

Directions: 


Étape 1: La carte finie mesure 7 pouces sur 6 pouces. Coupez un papier cartonné blanc 12 x 7 et pliez à 6 pouces pour faire une carte pliée par le haut. Découpez deux morceaux de 6 x 7 pouces de papier Daffodil Delight, feuille n ° 1A, et encrez les bords avec de l'encre chartreuse vivid. Collez à l'intérieur de la carte.


Step 1: The finished card measures 7 inches by 6 inches. Cut a 12 x 7” white cardstock and fold at 6 inches to make a top fold card. Cut two 6 x 7” pieces of the Daffodil Delight Paper, sheet #1A, and ink the edges with vivid chartreuse ink. Glue inside the card.


Étape 2: Coupez les morceaux de papier suivants et collez-les les uns sur les autres: papier cartonné noir 5 11/16 x 6 15/16 ", papier design vert 5 1/2 x 6 11/16", papier design rose 5 1 / 4 x 6 1/2 ”, papier cartonné blanc 4 7/8 x 6 1/8”, papier cartonné noir 4 3/4 x 6 ”.

Step 2: Cut the following pieces of paper and glue them on top of each other: black cardstock 5 11/16 x 6 15/16”, green designer paper 5 1/2 x 6 11/16”, pink designer paper 5 1/4 x 6 1/2”, white cardstock 4 7/8 x 6 1/8”, black cardstock 4 3/4 x 6”.


Étape 3: Découpez les Swirly Borders Accents à l'aide du HCD1-7262 dans du carton blanc et utilisez le négatif comme pochoir sur un carton blanc 4 1/2 x 5 3/4 ”. Utilisez de l'encre Vivid Chartreuse pour créer des motifs tourbillonnants sur votre arrière-plan. Collez votre carte à l'aide d'un adhésif transparent sec.

Step 3: Cut out swirls using HCD1-7262 Swirly Border Accents Die from white cardboard and use the negative as a stencil on a 4 1/2 x 5 3/4” white cardboard. Use Vivid Chartreuse ink to create swirl patterns on your background. Glue on your card using dries clear adhesive.


Étape 4: Tamponnez les jonquilles du jeu de tampons Delightful Daffodil HCPC-3943 et du jeu de tampons adhésifs Délicieux jonquille et jacinthe HCPC-3944 avec de l'encre noire. Colorez-les avec des marqueurs Zig en vert clair, jaune et rose. Coupez avec les matrices coordonnées.


Step 4: Stamp the daffodils from the HCPC-3943 Delightful Daffodil & Butterfly Cling Stamp Set and the HCPC-3944 Delightful Daffodil & Hyacinth Cling Stamp Set with black archival ink. Color them with Zig Markers in light green, yellow and pink colors. Cut with the coordinating dies.


Étape 5: Couvrez vos découpes de laque 3D pour donner un effet verni à votre fleur. Laisser sécher complètement.

Step 5: Cover your diecuts with 3D lacquer to give a varnished effect to your flower. Let dry completely.


Étape 6: Collez les fleurs sur votre carte. Ajoutez des étamines roses, noires et vertes pour donner un peu de dimension.

Step 6: Glue the flowers on your card. Add pink, black and green stamens to give a little bit of dimension. 


Étape 7: Tamponnez un sentiment du jeu d'estampes Just For You Sentiments sur une feuille de papier rose. Encrez le bord avec de l'encre chartreuse vive et collez-le sur votre carte avec de la mousse 3D.

Step 7: Stamp a sentiment from Just For You Sentiments Cling Stamp Set on a pink piece of paper. Ink the edge with vivid chartreuse ink and glue it on your card with 3D foam.


Pour plus de trucs concernant la nouvelle collection, vous pouvez regarder le vidéo suivant:

TOP TIP: Learn more techniques with the Delightful Daffodil collection in this video here https://www.heartfeltcreations.us/video/how-to-create-multi-colored-3d-stamped-image-the-ez-way


Image hébergée par servimg.com