mercredi 26 février 2020

Enjoying the moment

Bon mercredi !

Laissez moi aujourd'hui vous présenter, comme à chaque mercredi, ma création faite à partir des collections de Heartfelt Creations.

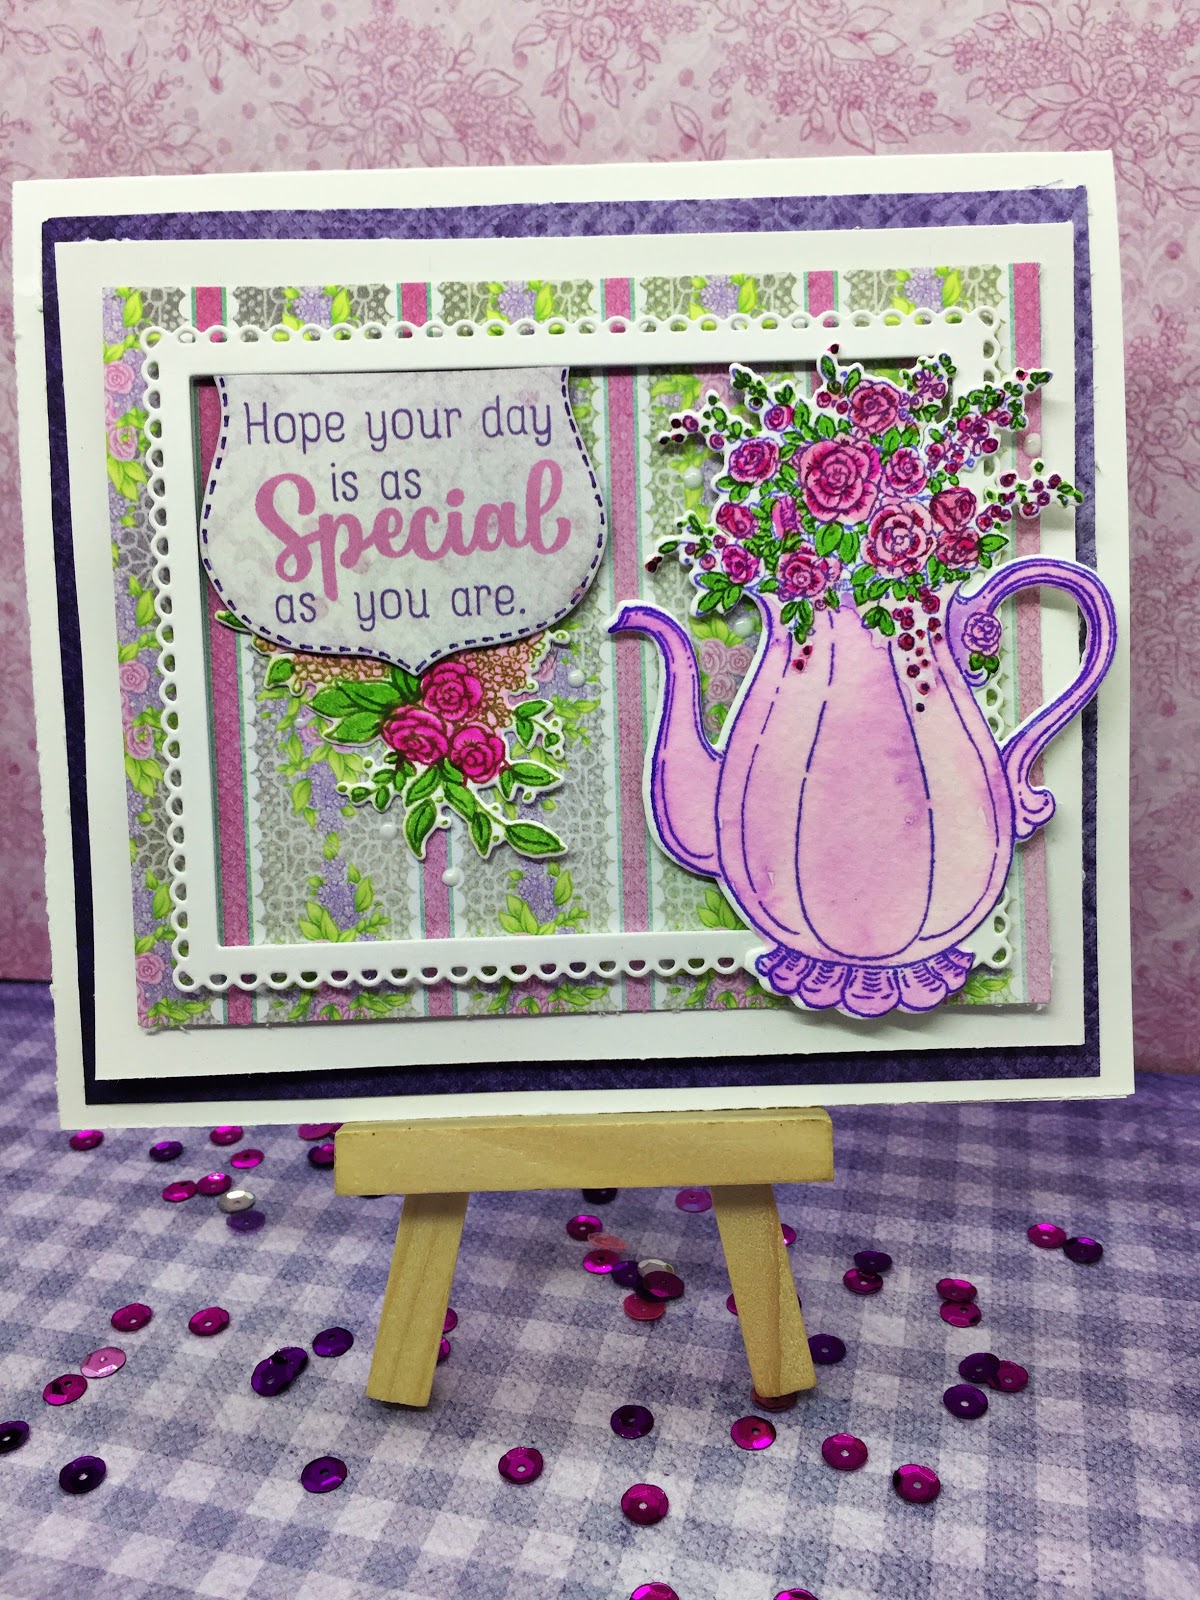
Aujourd'hui je vous partage la troisième créations que j'ai faite avec la collection Tea Time Collection.  J'ai fabriqué un petit tag avec une pochette à l'intérieur dans laquelle j'ai inséré un petit sachet de thé !  Ceci peut être très plaisant a jouter sur un petit cadeau !


Voici les produits que j'ai utilisés de meme que les étapes de la fabrication de ce tag.


Products Used:
Scor-Tool368771
Spellbinders Tool N' One359848
Scor-Pal Measuring & Scoring Board173842
Stack and Store Daubers-Pack of 30HCDA2-450
Double Dots 100pc. -3D Foam CirclesDDOTS
Designer Dries Clear Adhesive159723
StazOn Stamp CleanerTSSZSC
5pc. Acrylic Block SetSUAH05
Stamp Mat PadD110305
Heat It Craft ToolRAHT
Deluxe Flower Shaping KitHCST1-401
Ranger Archival Ink Pad - SunflowerRACP005
Ranger Archival Ink Pad - Majestic VioletRACP494
Pastel Pearl Stamens-SmallHCS1-457-1
Assorted Pearl Stamens-SmallHCS1-459-1
Zig Clean Color Real Brush Markers - 36 Pack478455
Deluxe Flower Shaping Paper Pack of 50 - WhiteHCPP1-475
Butterfly Kisses Decorative DieHCD1-7179

Other Products: Die cutting machine Cut’n’boss, heat gun, cheesecloth, Gutermann sewing thread, water mister, hot glue gun, hot glue, scissors, ribbon. Stampin’pad Melon Mambo
For more tips on creating with the Oakberry Lane collection, watch the tutorial at https://youtu.be/HirfUN8NEYY.
Instructions: Tag size is 6 x 4". From the Tea Time paper Collection die cut the tag with the Album Tag and Accents using the large tag. Also, cut another piece of paper with the tag that you will tear with your fingers on the top. On the bottom of this tag, glue a lace of paper that you cut in the Tea Time paper. Ink the edge with yellow and violet ink with a dauber. Glue those papers together to make a pocket.
Stamp a cup from the My Cup of Tea stamp set in Majestic Violet ink onto white cardstock and diecut with coordinating die. Color it with zig markers. Cut a doily from the butterfly kisses decorative die set in the white paper color it in pink with a dauber. Glue the doily on the tag.
Stamp the Oakberry Lane blossoms and leaves with Violet archival ink on white card stock. Color the petals with violet and Sunflower ink. Color the leaves in Violet. Diecut with the coordinating dies. Shape the flowers by using the 3D Shaping Mold and give further shape with Deluxe Flower Shaping Kit tools. Add stamens in the centre of the flowers.
Put a cheesecloth and sewing thread on the left of your paper and glue your blossoms and leaves over it. Use from Ticket and tags set to diecut eyelet tag from Tea Time paper collection. Cut sentiment from the collection. Layer the sentiment on tag and onto card. Add teacup next to blossoms as shown.
Add thread and ribbon in the hole of your tag to complete it. Insert a little tea bag in the pocket of your tag.


mercredi 19 février 2020

Special as you are


Aujourd'hui je vous présente ma deuxième création faite à partir de la collection Tea Time de heartfelt Creations. Une collection basée principalement sur le plaisir de prendre le thé entre amis !


Voici les produits que j'ai utilisés, ainsi que les instructions.


Other Products: Die cutting machine Cut’n’boss, heat gun, water mister, hot glue gun, hot glue, scissors, unnel tray
For more tips on creating with the Tea Time Collection watch the tutorial at https://youtu.be/4bjPeZW_oT8.
For more tips on creating with the flower shaping molds, watch the tutorial at https://youtu.be/FSdPL7nXvQE.
Instructions: The finished card measure 6 inches by 5 1/4 inches. Cut the card base in a white card stock to 12 inches by 5 1/4 inches and score at 6 inches on the longer side. Fold to make a horizontal folding card. Cut a 5 3/4 x 5 piece of pattern paper from the Tea Time paper Collection and glue it to the card base. Then cut out another piece of pattern paper 5 x 4 and glue under a piece of white paper just a little bit larger. Glue it on the base card too with a 3D foam to give dimension to your card. Use 2 dies from the eyelet rectangle and basic to diecut a frame in a white cardstock. Glue it in the center of the card.
Stamp the Tea pot and the flower with the majestic violet archival ink on white card stock. Color it with light violet, violet, pink, and light green. Cut it with the coordinating die.
Cut a sentiment from the paper with the Ornamental tags and glue on the card over the stamped flowers.
Glue your Teapot on the right of your card with the 3D foam to give dimension.
To add a final touch, make dots with the white nuvo crystal drops.


Image hébergée par servimg.com

jeudi 13 février 2020

C'est l'heure du thé

La nouvelle collection de Heartfelt Creations est superbe pour tout ceux qui adore le thé !


Qui plus est, il y a une magnifique découpe qui nous permet de faire rapidement de jolies cartes avec une forme de théière, pour faire différent !


Voici les produits que j'ai utilisés pour faire ma carte ainsi que les étapes pour la réaliser !

HCDP1-2112                         Tea Time Paper Collection
HCPC-3903                            Special Teapot stamp set
HCD1-7286                            Special Teapot die set
HCS1-458-1                          Small bright pearls
HCPP1-475                            Deluxe Flower shaping paper
HCST1-401                             Deluxe Flower Shaping Kit
HCPC-3752                            Classic Rose stamp set
HCD1-7110                            Classic Rose die set
HCFB1-462 3D Rose Shaping Mold
HCD1-7244 Elements of Home Die
HCPC-3880 Elements of Home Cling Stamp Set
478455 Zig Clean Color Real Brush Markers - 36 Pack

RAHT Heat It Craft Tool
D110305 Stamp Mat Pad
31510 Funnel Tray
411231 5pc. Acrylic Block Set
159723 Designer Dries Clear Adhesive
DDOTS Double dots 100 pc-3D foam circles
HCDA2-450 Stack and Store Daubers-Pack of 30
173842 Scor-Pal Measuring & Scoring Board
359848 Spellbinders Tool N' One
368771 Scor-Tool


Other Products: Wow! embossing powder metallic gold rich, versamark stamp pad , Die cutting machine Cut’n’boss, heat gun, water mister, hot glue gun, hot glue, scissors, Strathmore watercolor paper, golden berry, funnel tray
For more tips on creating with the Tea Time Collection watch the tutorial at https://youtu.be/4bjPeZW_oT8.
Instructions: Score and fold a 6.5” x 10” piece of white card at 5”. Position the tea pot die over the side fold so that the handle of the tea pot is near, but not on the fold. Die cut through the 2 layers of card.
Stamp the teapot, the lid and the tag onto watercolour paper using transparent embossing ink, cover with gold embossing powder, remove excess and heat to set. Colour the teapot using zig real brush (violet, light violet. Pink, light green) and use water to give a watercolour effect. Die cut with the appropriate dies the 3 pieces. Stamp a sentiment in violet on the tag. Glue the lid and the tag by using 3D foam to give volume.
Stamp and emboss in gold, little leaves from the Elements of home stamp. Color in green with the zig marker and die cut with the coordinating die.
Stamp and emboss in gold the smaller roses on a vellum paper. Color the petals with the zig maker. Cut it with the coordinating die. Shape the flowers by using the 3D Shaping Mold and give further shape with Deluxe Flower Shaping Kit tools. Add stamens in the center of the flowers.
Position the leaves, flowers on the lid and the tag and secure onto the front of the teapot with hot glue. You can add some golden berries for the final touch.Image hébergée par servimg.com


jeudi 6 février 2020

Adore

Bonjour !

Bien que je fasse plus de cartes ces deniers temps, j'aime bien faire une page 12x12 de temps en temps !  Je crois que cette photo est probablement celle que j'ai utilisée le plus souvent !  Je ne me tanne pas !  J'adore la petite face de ma dernière la dessus !

Et j'ai fait des fleurs à la main avec un papier velin et de l'embossage en blanc histoire de faire différent cette fois-ci ! Plus bas vous aurez la liste du matériel que j'ai utilisé de même que les étapes de créations !


Other Products: Die cutting machine Cut’n’boss, heat gun, cheesecloth, Gutermann sewing thread, water mister, hot glue gun, hot glue, scissors, 28 lilac lane sequins, Prima Lace, Cuts2luv’s flair, distress ink twisted citron, stampin pad melon mambo, distress spray stain twisted citron, gesso clear art basics finnabair, white gesso liquitex, chipboard creative embellishment, versamark stamp pad, Utee clear, wow! Opaque bright white, Funnel tray
To see how to use the flower shaping tools, click here.
To see how to shape the peony, watch the video at https://youtu.be/L9_MLkvpGPQ.
Instructions: Click here to view a larger photo of this project. Take a light green 12 x 12 inch sheet. Start by applying a little clear gesso on your sheet to protect it because you want to create a watercolor effect in your background that requires a lot of water. With a brush, apply Distress Stain spray color twisted citron and add water to dilute the whole. Then make droplets of green and pink ink by shaking a brush gorged with ink over the sheet. Randomly stamp in green and pink wild aster spray stamps. Your background is ready.
Stamp the Peonies flowers with a versamark ink on vellum paper and emboss it in white. Color the back of the petal with pink ink. Cut it with the coordinatng die. Shape the flowers by using the 3D Shaping Mold and give further shape with Deluxe Flower Shaping Kit tools. Add stamens in the center of the flowers. Stamp and color your leaves in green with ink. Cut with the appropriate die.
Put a cheesecloth and sewing thread in the center of your paper and glue your picture over it (with 3D foam square to give volume). Paste next to your picture the flowers and leaves you just made. Add flair and wire next to your flowers.
Take a chipboard and paint it in white before coloring it in pink. Then emboss with clear Utee. Glue in the bottom of your picture as a title. At the right of your title, add 2 littles flowers and a flair.
Finish by adding a little bit of sequins.


Image hébergée par servimg.com