Aucun message portant le libellé scrapbooking. Afficher tous les messages

lundi 31 juillet 2023

C'est la fin d'une belle aventure

Aujourd'hui c'est avec beaucoup de tristesse que je vous présente ma dernière publication en tant que membre de l'équipe de design de la compagnie Heartfelt Creations.  Merci beaucoup Heartflet Creations (Emma Lou, Lynda, Ellen, Waneda) de m'avoir fait confiance il y a plus de 5 ans.  Merci pour ses magnifiques produits qui m'ont inspirés au fil du temps et qui continueront de le faire lorsque je prendrai place dans mon atelier.  Merci aussi a toutes mes compagnes du Design Team pour votre support, votre originalité, votre amitié. Ce fut un beau voyage, nous nous croiserons  surement  à nouveau !

Image hébergée par servimg.com


jeudi 22 septembre 2022

Bal de finissant

Bonjour !

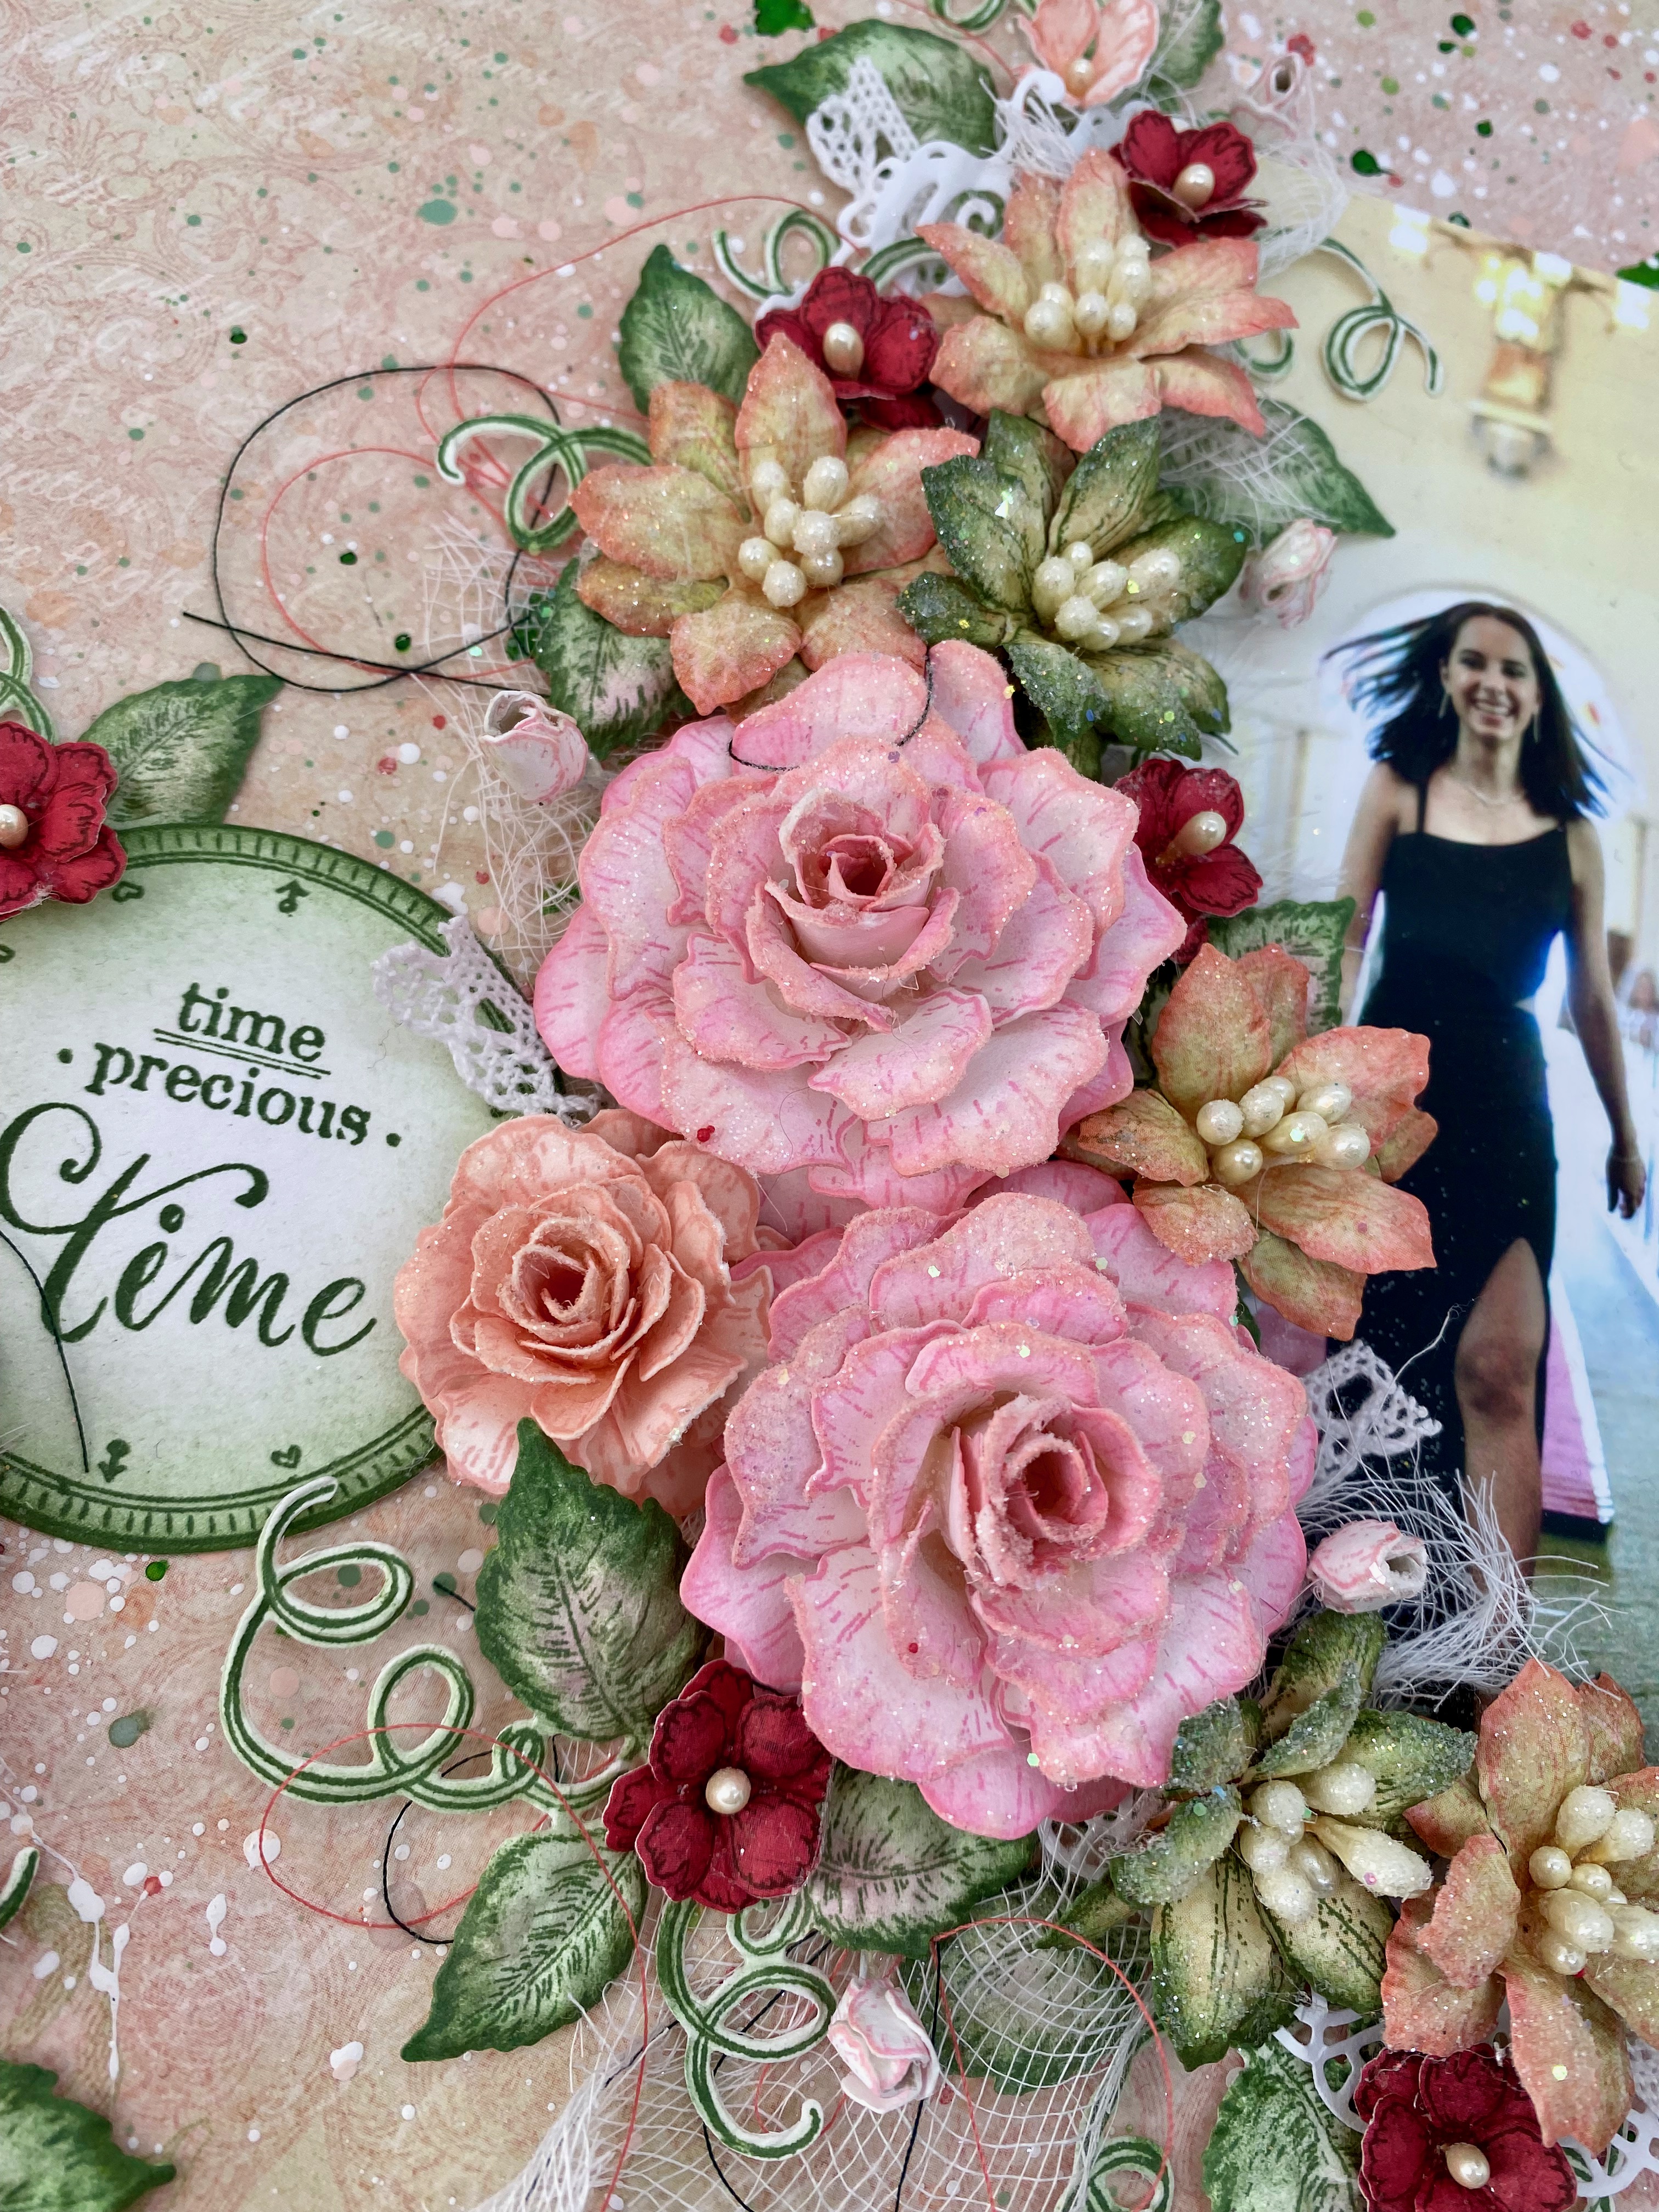
Aujourd'hui je vous présente une page avec une photo de ma belle grande fille lors de son bal de finissant.  J'adore cette photo d'elle, toute radieuse.  C'est pourquoi j'ai agrémenté cette page de tout plein de jolie fleurs faites à la main. J'espère qu'elles vous plairont !


Vous pouvez trouver ici les instructions et la liste du matériel utilisé en suivant ce lien:


Image hébergée par servimg.com


dimanche 6 septembre 2020

Have a beautiful day !

Et oui !  L'été tire à sa fin !  Profitons en donc pour immortaliser ses beaux moments en vue des jours plus frais qui arriveront bientôt !

Voici une page faite avec des fleurs fabriquées à la main avec la collection Oakberry Lane de Heartfelt creation.  J'adore ces fleurs.   J'ai ai ajouté des coquillages afin de nous faire un rappel des journées de plage comme sur la photo !


Products Used:
Sea Breeze Paper CollectionHCDP1-2107
A Day at Sea DieHCD1-7266
A Day at Sea Cling Stamp SetHCPC-3892
Pastel Pearl Stamens-MediumHCS1-457-2
Decorative Circle Frames DieHCD2-7306
3D Blossoms Shaping MoldHCFB1-469
Oakberry Lane Blossoms DieHCD1-7200
Oakberry Lane Blossoms Cling Stamp SetHCPC-3842
3-D Crystal Lacquer 4 oz3D1844
Deluxe Flower Shaping Paper Pack of 25 - WhiteHCPP1-468
Deluxe Flower Shaping KitHCST1-401
Stack and Store Daubers-Pack of 30HCDA2-450
Heat It Craft ToolRAHT
Stamp Mat PadD110305
StazOn Stamp CleanerTSSZSC
Designer Dries Clear Adhesive159723
Double Dots 100pc. -3D Foam CirclesDDOTS
Scor-Pal Measuring & Scoring Board173842

Other Products: Die cutting machine Cut’n’boss, heatgun, cheesecloth, Gutermann sewing thread, water mister, hot glue gun, hot glue, scissors, sequins, ribbon, Tim Holtz stencil burlap, Modeling paste liquitex, art stone finnabair prima, Color bloom spray soft teal, white gesso liquitex, prima rim frost lace, sea shell, nuvo embellishment mousse cosmic brown ans pacific teal, memory hardware pearl, distress ink wild honey, stampin’pad Bermuda bay

For more ideas on creating with the Decorative Royale Square & Circle Dies, watch the tutorial at https://youtu.be/tqmtn_TiVVw.

For more tips on creating with the Oakberry Lane collection, watch the tutorial at https://youtu.be/HirfUN8NEYY.

For more tips on creating with the flower shaping molds, watch the tutorial at https://youtu.be/FSdPL7nXvQE.

Instructions: The finished layout measures 12 inches by 12 inches. With the Hydra sponge, add white gesso on the diagonal of the page. With a burlap stencil add modeling paste to give dimension to your background over the gesso, also in diagonal of the page. Put cheesecloth all over it.

Die cut the second larger die from the HCD2-7306 Decorative Circle Frames Die twice in deluxe flowers shaping paper and glue them together. With 3D foam, glue your picture in the center of the layout. Cut it in two parts. Paste one part of the decorative circle under the left corner of your picture, and one under the right corner.

Make the 4 largest flowers from Oakberry lane collection. Stamp using Bermuda bay ink onto white flower shaping paper, colour the centre and shade the rest of the flower using the same color. Diecut with the coordinating die. Place face down into the flower shaping mold, spritz with water and run through the diecutting machine to shape. When dry, give further shape with Deluxe flower shaping kit tools. Poke a hole in the centre of the flowers and add stamens, secure with hot glue. Make 4 medium and 6 small flowers the same way with the distress ink Wild Honey.

Stamp tall grass with the Bermuda bay ink and die cut. Glue your flowers on the diagonal of your page. Add the grass and seashells all around it. Also add pearls and sewing thread.

Color art stone with color bloom spray soft teal. When dry, put glue on the page and add over it the little stones.

Diecut a sentiment from paper. Glue it on a slightly larger paper with a contrasting color. Add it to your page with 3D foam.


Image hébergée par servimg.com


mercredi 5 août 2020

Le mariage de 3 soeurs

Le 29 juillet dernier nous célébrions notre quatorzième anniversaire de mariage.  Quatorze ans déjà !  Ce fut une journée mémorable à tous les niveaux ! Mais plus particulièrement parce que ce fut un mariage triple, célébré avec mes deux soeurs.  Trois soeurs qui se marient la même journée !  


Products Used:
Flowering Dogwood Cling Stamp SetHCPC-3773
Flowering Dogwood DieHCD1-7129
3D Leafy Accents Shaping MoldHCFB1-467
Leafy Accents Cling Stamp SetHCPC-3835
Leafy Accents DieHCD1-7193
Wild Rose Paper CollectionHCDP1-2113
Ornamental Tags DieHCD1-7203
Pastel Pearl Stamens-SmallHCS1-457-1
Pastel Pearl Stamens-MediumHCS1-457-2
Deluxe Flower Shaping Paper Pack of 25 - WhiteHCPP1-468
Deluxe Flower Shaping KitHCST1-401
Stack and Store Daubers-Pack of 30HCDA2-450
Heat It Craft ToolRAHT
Stamp Mat PadD110305
Ranger Archival Ink Pad - Pink PeonyRACP649
StazOn Stamp CleanerTSSZSC
Designer Dries Clear Adhesive159723
Double Dots 100pc. -3D Foam CirclesDDOTS

Other Products: Die cutting machine Cut’n’boss, heatgun, cheesecloth, Gutermann sewing thread, water mister, hot glue gun, hot glue, scissors, ribbon, stampin’up ink chocolat chip and pistachio pudding, nuvo embellishment mousse cosmic brown, paper twine cording, Queen and Co more goosebump, prima trim lace, making memories stickers, berry from florist material, sewing machine
To see how to shape the flowering dogwood, watch the video at https://youtu.be/gI8RqHAt3vE.
Instructions: Take a pink paper from the Wild Rose collection and cut it to have a 11 x 11 inch square. Lightly distress the edge with a tool designed for this purpose or simply use the blade of a scissor. Glue this paper on a 12 x 12” green paper from the same collection. Stitch with white thread all around pink paper.
Take a pink paper from the Wild rose collection and cut it to have a 5 1/2 x 3 1/2 inch rectangle. Lightly distress the edge with a tool designed for this purpose or simply use the blade of a scissor. Do the same thing with a 6 x 4 inch green paper. Glue those papers on each other and paste your picture on it. Cut 2 swirls from the Ornemental Tag die in the white cardstock paper and glue it on each side of your picture. Glue it in the center of your 12 x 12” paper with 3D foam to give dimension.
In the two papers used previously, cut two tags of different sizes (from ornemental die) that you will glue one on the other with 3d foam. Paste your title on it. Glue it under your picture with 3d foam.
Make a lot of leaves with the leafty accents products. Stamp using chocolate chip ink onto white flower shaping paper, colour the rest of the flower using pistachio pudding ink. Diecut with the coordinating die. Place facedown into the flower shaping mold, spritz with water and run through the diecutting machine to shape. Put cheesecloth under the picture and glue those leaves over the cheesecloth.
Make a lot of Dogwood flowers. Stamp using pistachio green ink onto flower shaping paper, colour the centre with brown. Diecut with the coordinating die. Give further shape with Deluxe flower shaping kit tools. Shade the edge of the flower using nuvo cosmic brown. Poke a hole in the centre of the flowers and add stamens, secure with hot glue. Do the same thing by using the pink color this time.
Glue all the paper all around the picture and the title. Add spring wire, lace, sewing thread and goosebump. Also add berry from florists material to add the final touch.