jeudi 24 septembre 2020

Just for you

Bonjour !

Aujourd'hui Heartfelt Creations nous présente sa nouvelle série d'étampe.  Elles sont idéales pour faire des titres. Je vous présente une carte faite avec une de ces étampes de voeux. Le tout agrémenté de felurs faites à la main avec la collection Wild Rose.


Products Used:

Ornate Just for You Cling Stamp SetHCPC-3936
Ornate Just for You DieHCD1-7321
Elaborate Birthday Cling Stamp SetHCPC-3937
Summer's Garden Paper CollectionHCDP1-2119
6" x 6" Swing Fold Card - WhiteHCCB1-482
French Cottage 'scapes Cling Stamp SetHCPC-3909
French Cottage 'scapes DieHCD1-7293
Bridal Bouquet Stamens-SmallHCS1-460
Pastel Pearl Stamens-MediumHCS1-457-2
Assorted Bead Stamens-MediumHCS1-459-3
Rock Candy Stamens-SmallHCS1-459-4
Small Wild Rose DieHCD1-7289
Large Wild Rose DieHCD1-7290
Small Wild Rose Cling Stamp SetHCPC-3906
Large Wild Rose Cling Stamp SetHCPC-3907
Small 3D Wild Rose Shaping MoldHCFB1-486
Large 3D Wild Rose Shaping MoldHCFB1-487
Luxe Gold CardstockHCGP1-488


Other Products: Die cutting machine Cut’n’boss, heatgun, water mister, hot glue gun, hot glue, scissors, Prima lace, ribbon

For more ideas on creating with the Special Sentiments Stamps & Dies, watch the tutorial at https://youtu.be/-dYnAWXIH3E.

For more tips on creating with the Window Scene cards & dies, watch the tutorial at https://youtu.be/LnM95GR92ao.

For more tips on creating with the Wild Rose Collection watch the tutorial at https://youtu.be/2ALPhFnT-qI.

Instructions: The finished card measure 6 x 6”. For the base of your card use 6 x 6 Swing Fold Card-White. Cut 3 pieces of 6 x 6” in paper # 11B. Lightly ink the edge of the paper with Vivid Chartreuse ink. Glue it on your card base (one on the front and two inside). Cut a big circle with the rounded sunlight window die in the paper # 8B. Ink the edge also with the vivid chartreuse ink and glue it inside the card. Cut a big circle in gold paper with the Rounded Eyelet Window die. Glue it on the front round base. Cut 2 half circles with the same kit of die in the paper #3B and glue it on the gold circle.

Cut a green paper (#8B) with Ornate just for you die. Stamp the coordinating stamp with Pink Peony ink on a white cardstock and cut with the appropriate die. Glue it on the green diecut and glue this sentiment onto the front of the card.

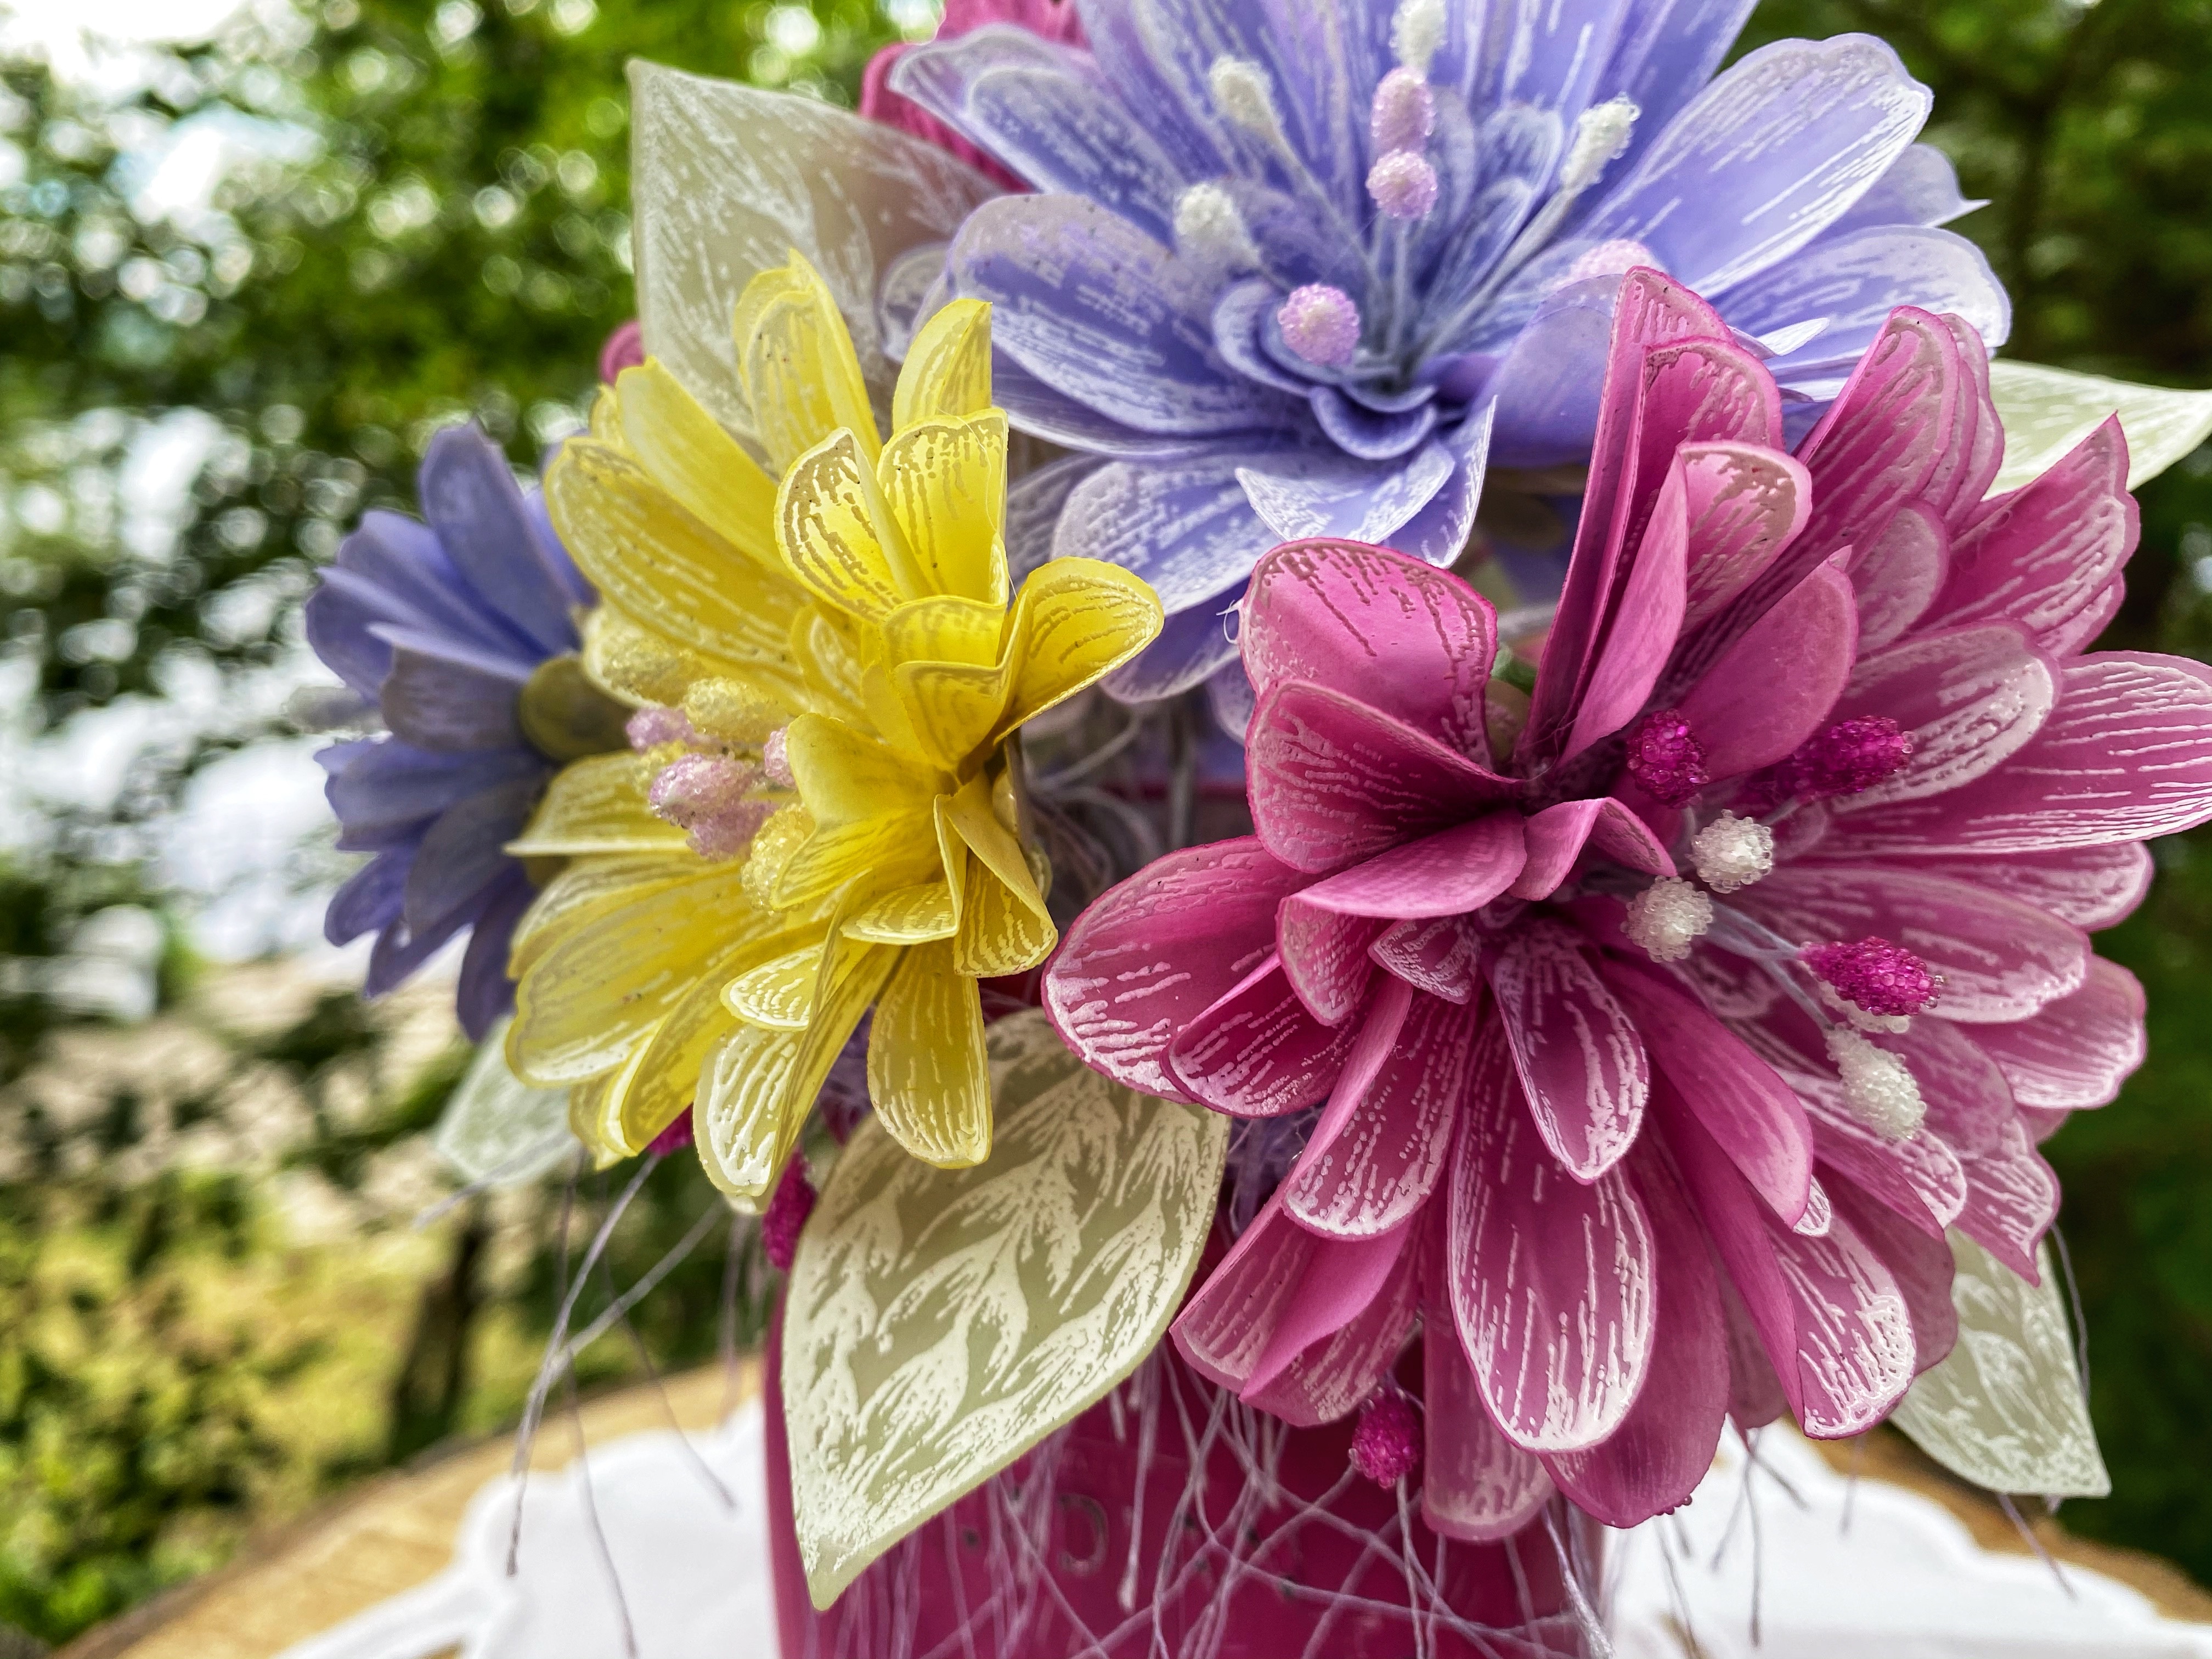
Stamp your flowers from the Wild Rose collection with coral ink onto white flower shaping paper, color the center with vivid chartreuse ink and shade the rest of the flower using coral ink. Color the reverse of the flowers and diecut with the coordinating die. (Do the same thing for the leaves and use the green ink vivid chartreuse). Place facedown into the flower shaping mold, spritz with water and run through the diecutting machine to shape. When dry, give further shape with Deluxe flower shaping kit tools. (I used 3 petals for each flower). Put nice white and green candy rock stamens in the center of your flowers. Put glue on your flower with hydra sponge and add glitter on it. In the same way, make two little flowers with the French cottage collection.

Glue 3 flowers and 2 leaves on the right of your card, next to the sentiment. You can also add two little flowers made with the French Cottage Collection kit on the left corner of the card (one green, one coral). To add the finishing touch, simply add lace, ribbon and green stamens! Inside the card, stamp a sentiment with green ink from the Elaborate Birthday cling stamp set.


mardi 15 septembre 2020

Hocus Pocus


🌈 CRÉATION DT - VÉRONIQUE 🌈
Pour ma première publication dans la revue Creative Scrappers je suis bien fière d'y présenter les produits de Les Créations Edith Cloutier. Je suis une inconditionnelle de l'Halloween et il y a de magnifiques planches à découper sur ce thème ! Je les ai utilisé pour garder en souvenir nos séances photos halloweenesque !
Pour cette page j'ai utilisé:
-Découpes Têtes de mort
-Découpes Mots Cartonnés: Halloween
-Découpes Fleurs Cosmos Vert


Image hébergée par servimg.com

samedi 12 septembre 2020

Réaliser un pot mason fleuri, étape par étape

Bonjour !


Aujourd'hui je vous présente un petit tutoriel bilingue pour vous montrer comment j'ai réalisé ce magnifique pot mason décoratif avec la nouvelle collection Garden's summer de Heartfelt Creations. Nous pouvons facilement créer de superbes fleurs zinnia en vellum avec ces nouveaux produits.  Les explications sont tout juste ici: 

EZ Step by Step Tutorial: Create beautiful vellum Zinna flowers!


Directions:


Step 1:

Let’s begin with the flowers.  For each flower, stamp  3 images  of the same size plus two smaller from Large Garden Zinnia Cling stamp sets ans Small Garden Zinnia cling stamp set. Use white pigment ink on vellum cardstock. Sprinkle white heat embossing powder on each stamp, dust extras and heat set.


Étape 1: Commençons par les fleurs. Pour chaque fleur, tamponnez 3 images de la même taille plus deux plus petites des jeux d'estampes Large Garden Zinnia Cling et du jeu d'estampes Small Garden Zinnia. Utilisez de l'encre pigmentée blanche sur du papier vélin. Saupoudrez de la poudre à embosser à chaud blanche sur chaque étampe, et chauffez avec votre fer à embosser.


Step 2:

Cut the florals using coordinating dies from summer’s garden collection.


Étape 2: Découpez les fleurs à l’aide de matrices coordonnées de la collection Summer Garden.     


Step 3:

Color the 4 florals using distress oxides : squeezed lemonade, shaded lilac, seedless preserves.  Color one small image with bundled sage for each flower.


Étape 3: Colorez les 4 fleurs avec les encres Distress oxides : squeezed lemonade, shaded lilac, seedless preserves.. Pour chaque fleur, colorez une petite pétale avec.l’encre Bundled sage.      


Step 4:

Pinch the petals of the flowers one by one with your fingers.

Étape 4: Pincez les pétales des fleurs une à une avec vos doigts.     


Step 5:


With the stylus, on the Deluxe flower shaping mat press firmly to give shape to your petals. Glue the 3 flowers one on the other with a gun to stick by putting the smallest in the center. Insert a dozen stamens in the center of the flower.


Étape 5: Avec le stylet, sur le tapis de mise en forme de fleurs, appuyez fermement pour donner forme à vos pétales. Collez les 3 fleurs l'une sur l'autre avec un pistolet à coller en plaçant la plus petite au centre. Insérez une douzaine d'étamines au centre de la fleur.   


Step 6:


With a gun to stick, stick the last green flower at the base of your petals. Solidify the metal wire together.


Étape 6:  Avec un pistolet à coller, collez la dernière fleur verte à la base de vos pétales. Solidifiez les fils métallique ensemble.     


Step 7:


 Take an old mason jar.  Paint it in white gesso and then paint it in pink.


Étape 7:   Prenez un vieux pot Mason. Peignez-le en gesso blanc puis peignez-le en rose.   


Step 8:


Arrange you flower in the mason jar (you can put little rock inside to help or  floral foam). Stick a ribbon all around the neck of your jar. Use sand paper to give a distress look to your jar.


Étape 8:   Disposez vos fleurs dans le pot Mason (vous pouvez mettre de la petite pierre à l'intérieur pour aider ou de la mousse florale). Collez un ruban tout autour du cou de votre pot. Utilisez du papier de verre pour donner un aspect de usé à votre pot.   


Step 9:


As for flowers, stamp, color and cut leaves. Glue them on metal wire. Use them to fill in the empty spaces in your flower arrangement.


Étape 9: tamponnez, coloriez et coupez les feuilles. Collez-les sur du fil métallique. Utilisez-les pour remplir les espaces vides de votre composition florale.  


Step 10:


You can also add pink  stamens in your jar to add a final touch.


Étape 10: Vous pouvez également ajouter des étamines roses dans votre pot pour ajouter une touche finale.   


Heartfelt Creations Products:


Other Products: Mason jar, Distress Oxide - Bundled Sage, Squeezed lemonade, Shaded lilac and Seedless Preserves, brush, white gesso, acrylic paint magenta, sand paper, ribbon, floral foam, funnel tray